How to Build a Bird House Out of Scrap Wood
All the bird houses I've created have been made out of scrap wood. I don't follow any particular design and just expect whatever bird that wants it can move in. I've found that ALL the houses I've made have been occupied. The only exception is when two houses are too close together. I gather there are territorial reasons for this. This page is a description of how I go about making the house and the steps involved.
Step 1: Choose your wood
| The sources of wood range from scraps left over from other projects,
firewood and walls from buildings that have come down. I don't worry
about the quality of the wood. It can be as rotten and ugly as
possible. As I see it, the house just gets character from this and
the birds have not complained yet. In fact, the houses with holes
and defects are repaired by the birds!
There are 3 pieces of wood you need to obtain. Board #1: The front, floor and back - It's important that you use the same width of wood for these three parts of the house. This GREATLY aids in the construction. In general you want rather thin wood. The front of the house opens more easily if it's thin. The only drawback to this is the back of the house is what nails onto the tree. You'd like this thicker for more strength. Therefore, if you have a piece of wood that is the same width, but thicker, use it for the back. Board #2. The sides - I like this piece of wood to be as wide as possible. This gives the bird more floor room and the house more depth. Board #3. The roof - Doesn't matter much as long as it's large enough to cover the house when it's done. I've used all kinds of ugly and too large of pieces in the past. |
 |
Step 2: Cut the sides
| Measure an arbitrary distance of x from either side of the board (see diagram). You want the value of y to be about 1-2 inches greater than x. This will determine the slope of the roof. Use a pen or nail to mark the line you will cut. Then cut it! |  |
Step 3: Cut the front
| Measure the same distance of x as you did for the sides. This will become the front of the house (see diagram). Once again, use your nail or pen to mark the line, then cut! |  |
Step 3: Cut the floor
| The floor is by far the most tricky measurement in this design. The distance of z must be smaller than the width of wood used for the sides. This is so the back and front of the house are flush (see diagram). Mathematically, you take twice the thickness of the board used for the front and back and subtract it from the width of the board used for the sides. It's important to error on the side of z being smaller rather than larger. The birds are going to fill the floor with nesting material anyway. |  |
Step 4: Cut the back
From your original board used to obtain the front and floor cut off a length of wood longer than side y. This is so you'll have an area to nail onto a tree. I like to make this length 4-5 inches longer than y.
Step 5: Cut the roof
There's not much to say about the roof. Just make sure its length and width are large enough to cover the top of the house. The roof is the last to be nailed on, so I don't even think about it until the rest of the house is complete.
Step 6: Nail the sides to the back
| The order in which you nail/screw the house together is important otherwise things won't fit very well. The first step is to nail each of your sides to the back of the house. Make sure that your roof will still be able to sit flush. Don't worry about holes, gaps or spaces. I've found the birds like these and will plug anything they don't like with twigs anyway. |  |
Step 7: Nail the floor to the sides
| The next step is to attach the floor to the sides. Fit the floor so it meets the back of the house. You may want the front end of the floor to be slightly lower than the back end. This is so any moisture that accidently gets inside the house can somewhat drain towards the front of the house. The diagram shows this somewhat exagerated. Also, put the floor somewhat higher in the sides so it's protected from outside rain (see diagram). |  |
Step 8: Nail the front to the sides
| Naturally, any good birdhouse must have a way to be opened. This is so you can clean out the previous years nests and kick out the mice that have moved in over winter. Therefore, the front of the house is also a door. The front of the house is only attached by two nails which act as hinges. See the red dot on the diagram to see what I mean. The front of the house swings open from the bottom. When attaching the front to the sides make sure you leave a small gap at the top. That way when you open the front when the roof is attached the wood doesn't get stuck on the roof. I can't count the number of times I've made this mistake. See the diagram for an exagerated description. The trick is leave as little gap as possible but yet leave room for the top of the door to not hit the roof. The thicker your wood for the front the larger this gap must be. Trial and error will teach you! |  |
Step 9: Nail roof to the sides
| This is a simple step as long as you can get the roof nailed into the edges of the sides! I sometimes drill these holes a bit before nailing to prevent cracking the sides of the house. Also, the wood I use for the roof is usually oversized firewood which makes nailing hard! Make sure the roof you choose is large enough to cover the entire top of the house, both the sides and front should have some overhang. |  |
Step 10: Drill and insert a locking pin (nail)
| As the house is constructed right now the front will swing open by itself. Therefore, you need to pre-drill a hole and insert a nail that will act as a locking pin. Make sure to drill the hole larger than the nail is round. The wood will swell with moisture over time and the wood will warp. If you don't do this then you'll need a pair of plyers to get the pin out. Then again, you don't want the nail so loose it falls out by accident. I have had this happen a number of times as well. Finally, make sure that you don't drill the hole deeper than the nail is long. You want a bit of the nail sticking out so you can grab onto it. You only need a single nail as the locking pin and I place it where you see the green dot in the diagram. |  |
Step 11: Drill the entrance hole
| Now it's time to drill the hole for the birds to enter. I choose hole sizes from 3/4 inch all the way up to 3 inches depending on the size of the house. I have no idea what kind of bird is going to take the house so I just try to make houses with the full range of sizes. You'd be surprised how many of the holes are actually enlarged over the years by them pecking and chewing at the entrance. When you drill/cut the hole make sure to not hit your red hinge nails. |  |
Step 12: Nail the mounting nails
| Last but not least is to put in a few nails which will be used to attach the house to a tree or post. I like to put these nails in during the construction of the house so it's easier out in the field to get them attached. There's no trick here. I typically use 3 nails. |  |
| This is what a typical house looks like. You can bearly see the locking-nail on the lower-right side of the house. | 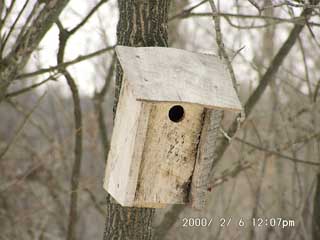 |
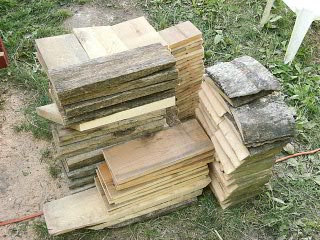 |
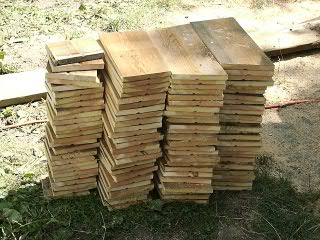
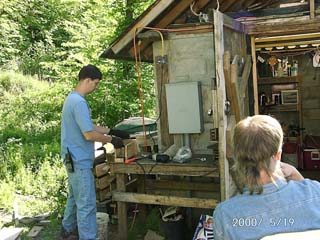
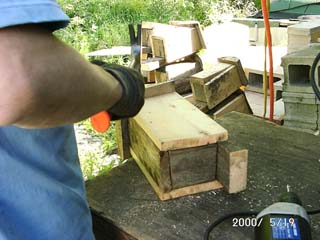
When it's time to build houses I very often pre-cut wood to build several at once. My record number is somewhere around 27 houses at once. This takes me about 2-3 days to complete. |
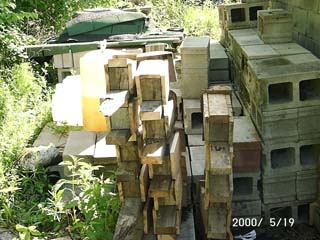 |
Here is a pile of houses that need to be put up yet. They sometimes sit on the ground for weeks before I find the time to putting them up. |
 Wildflower
Seed Sale